Let’s say you’re using Google Jamboard, and you want to share a Jam with your entire class. You could share this document by changing the share settings to give unrestricted access, but that method isn’t very private, and when students come in, they’ll all enter as anonymous users. You could also share it with your entire class by assigning it via Google Classroom, but sometimes you might just want to create a quick Jamboard without going through that extra step.
Without a Google Contacts class list, you’ll be stuck manually entering all of your students’ emails in order to share this Jamboard with them. Instead, once you’ve set up your list, you’ll be able to simply enter the name of your list and that will auto-populate all your students’ individual emails.
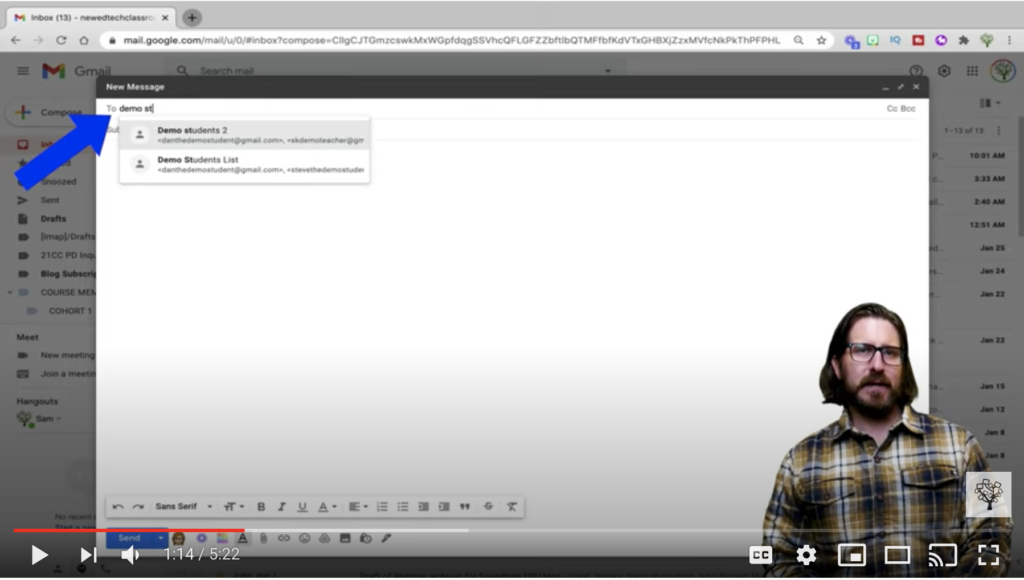
The same is true for all Google apps. So let’s say you’re over here in Gmail. Once you’ve already set up your class list, you’ll only need to type the name of the list in order to populate every student email address from your class.
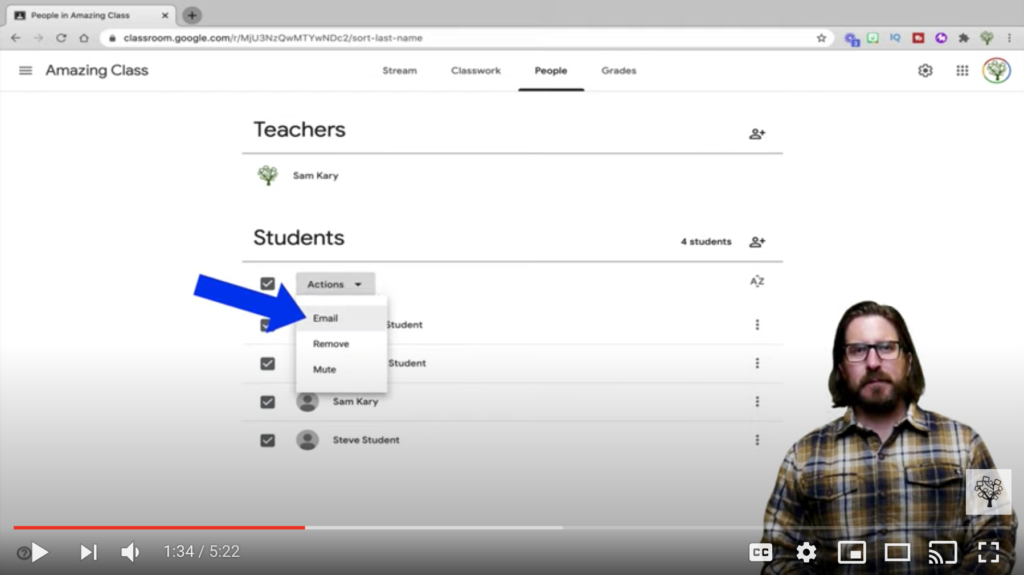
To create a class list, let’s start over here in Google Classroom. First, go to the “People” tab, and select the “Action” box underneath “Students.” Then on the dropdown menu, choose “Email.” Once you’ve elected to email all your students, an email template will pop up with all your students’ email addresses.
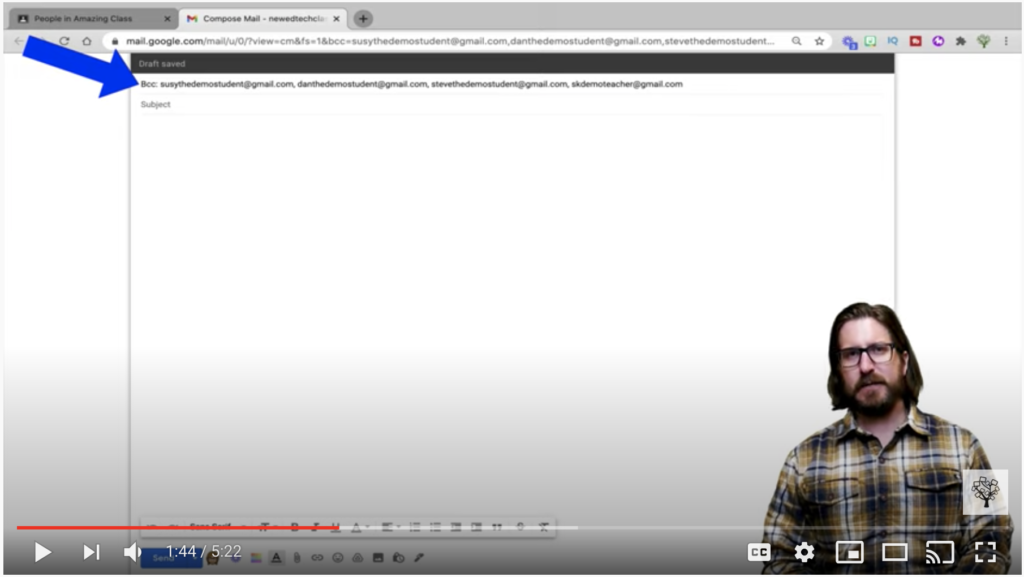
You’re going to want to copy and paste all of these student email addresses into Google Contacts in order to make your class list. To do this, click on the BCC box with their emails, choose Command + A on a Mac or Control + A on a PC to select all, and then click Command or Control C in order to copy all the addresses.
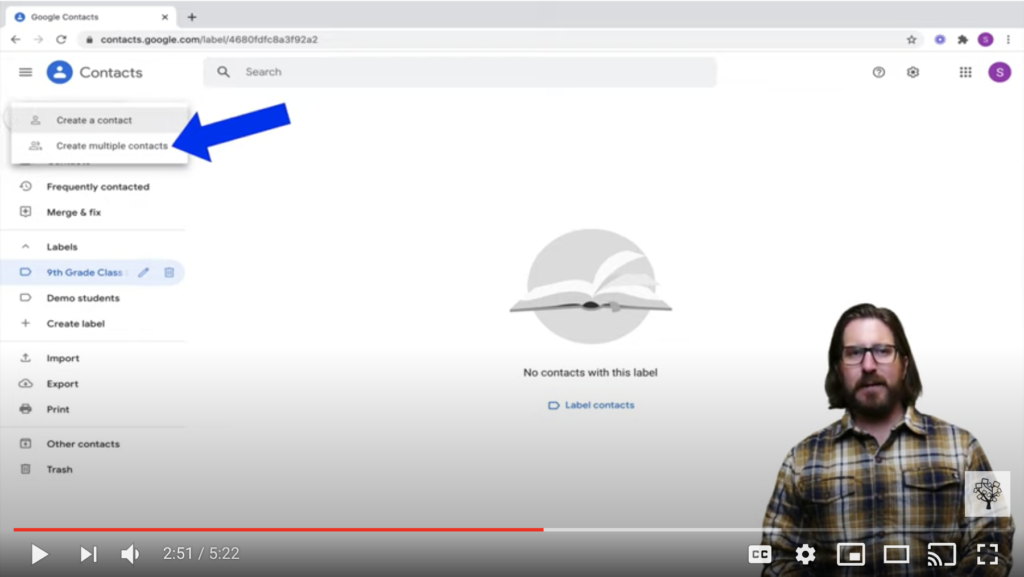
Then, head over to Google Contacts, which you can find at contacts.google.com. Click “Create Label,” and then create a label with the name of your class. For example, you might name it: 9th Grade Class List 2021. Then, click Save.

You’ll notice that if you click on the label you just created, there currently aren’t any contacts under that label, so you’ll need to bring them in. You can do that by going up to “Create Contact” and then select “Create Multiple Contacts.”
Since you’ve already copied all my student email addresses, you can hit command V on a Mac, or Control V on a PC, to paste all the email address in. You’ll also just want to verify that you’ve added these new contacts under the correct label, which you can check in the space shown below.
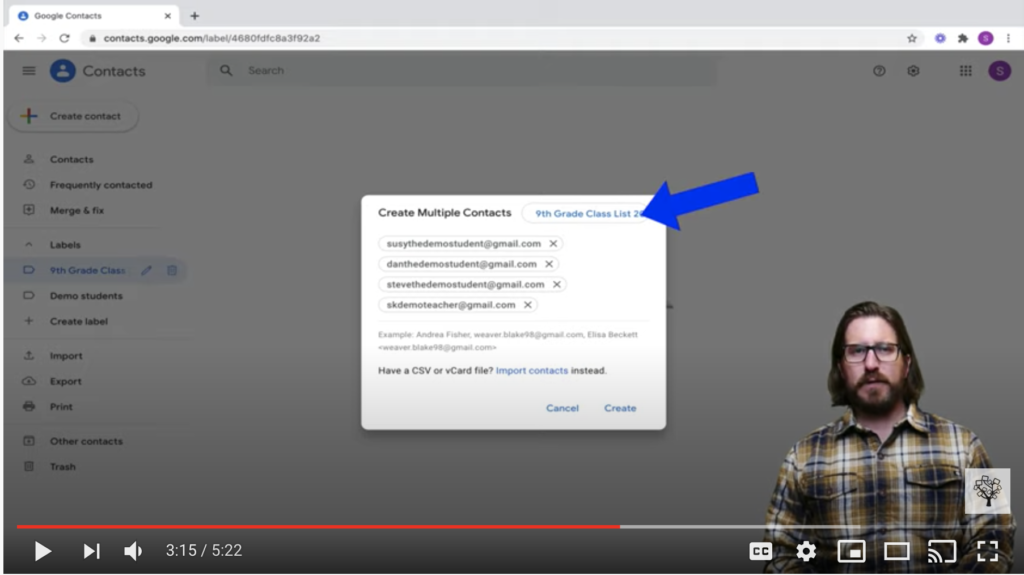
Once you’re ready, click “Create” and you’ll see that all the email addresses you just copied and pasted in have been added to your “9th Grade Class List.”

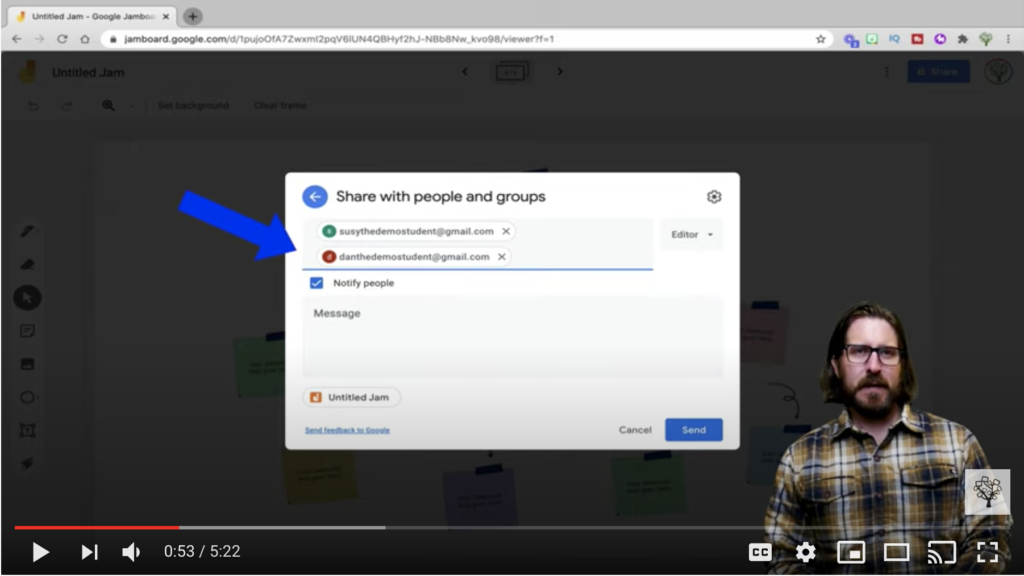
Now, if you go back to Google Jamboard, when sharing the document, just start typing “9th Grade Class List”, select your class list, and you’ll see all your student emails automatically populated in the share notification window.

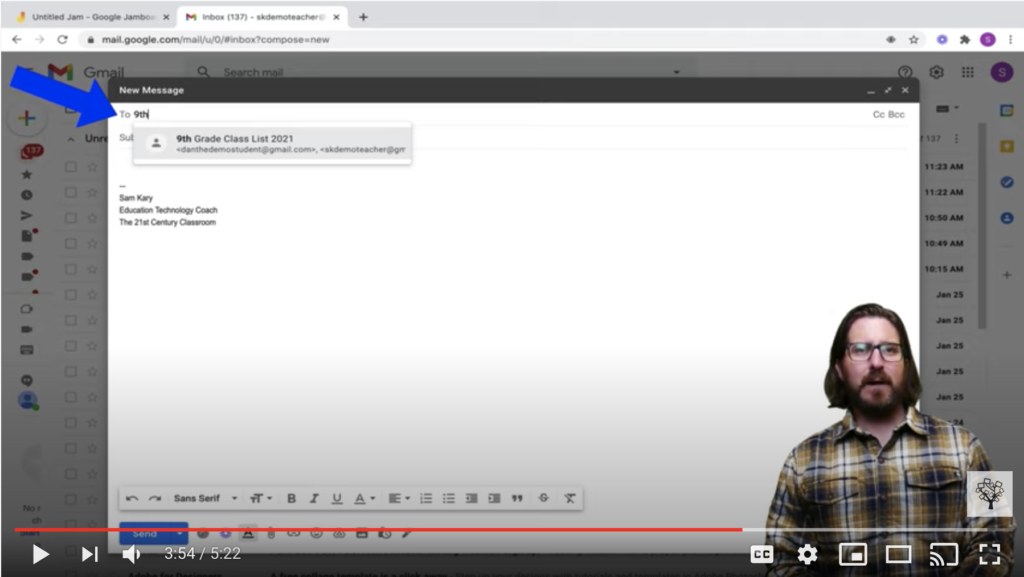
Similarly, when composing a new email in Gmail, you’ll just need to type “9th Grade Class List 2021” in order to auto-populate all of your students’ email addresses in the “To” window.