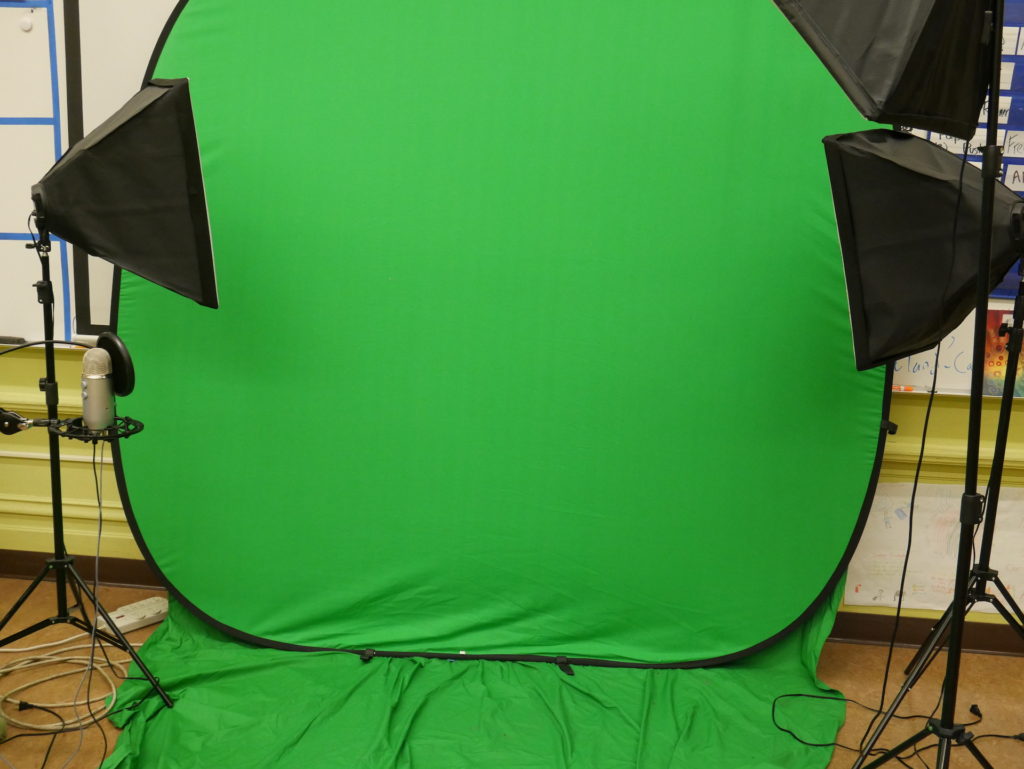
Most teachers who use green screening aren’t trying to make a professional-grade movie with students. In this case, simply painting a wall green, hanging a green sheet, or purchasing an affordable popup green screen will do.
I personally prefer the popup green screens, and purchased this Impact Super Collapsible green screen from Amazon for around $100. I used to use a green sheet, but found that it wrinkled too easily, and made Chroma Keying out the green more susceptible to green seeping (where green appears around the edge of the image). Popups have a smoother screen surface that don’t require ironing, and I can easily compact it down and store it in my backroom.
Next, basic studio lighting helps increase the quality of the videos, though strong overhead lights will also work.
Fancierstudio makes relatively cheap green screen kits that include lights, and would work well for a classroom setting.
Lastly, you’ll need to figure out the best filming scenario for your students. There’s next to no extra space at my school, so filming in a separate room wasn’t really an option. Plus, if filming outside of class, you’ll have to deal with the logistics of bringing students in and out of the room.
After some trial-and-error, I decided that my best scenario was to have a filming day in which students perform and film in front of the other students. If you go this route, it’s helpful and fun to have “stage hands” to bring props in and out of scenes, and to assign students to hold up “quiet on the set” signs and a make-shift clapperboard.
Without the right planning, making green screening videos with students can easily turn into a gimmick.
In reality, green screening is really just another video creation strategy that should be taught alongside other video production skills. Since academic rigor isn’t inherent to green screening, most of students’ energy and focus should go into the quality of their pre-production video planning, as well as the video editing.
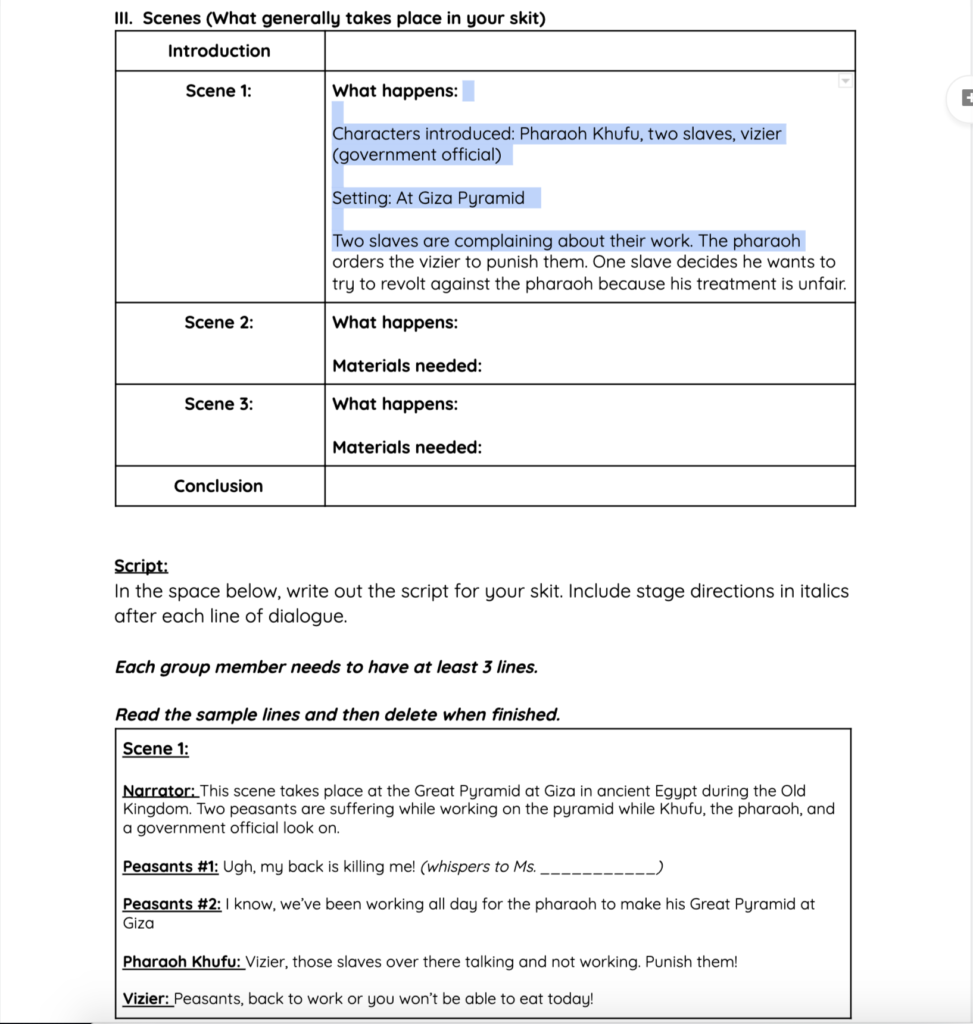
Assigning students a pre-production video planner, is essential. Here, students work on collaboratively in a group to plan gather information and plan their videos for about a week before filming (including rehearsal).
Take a copy of my green screen video planner here.
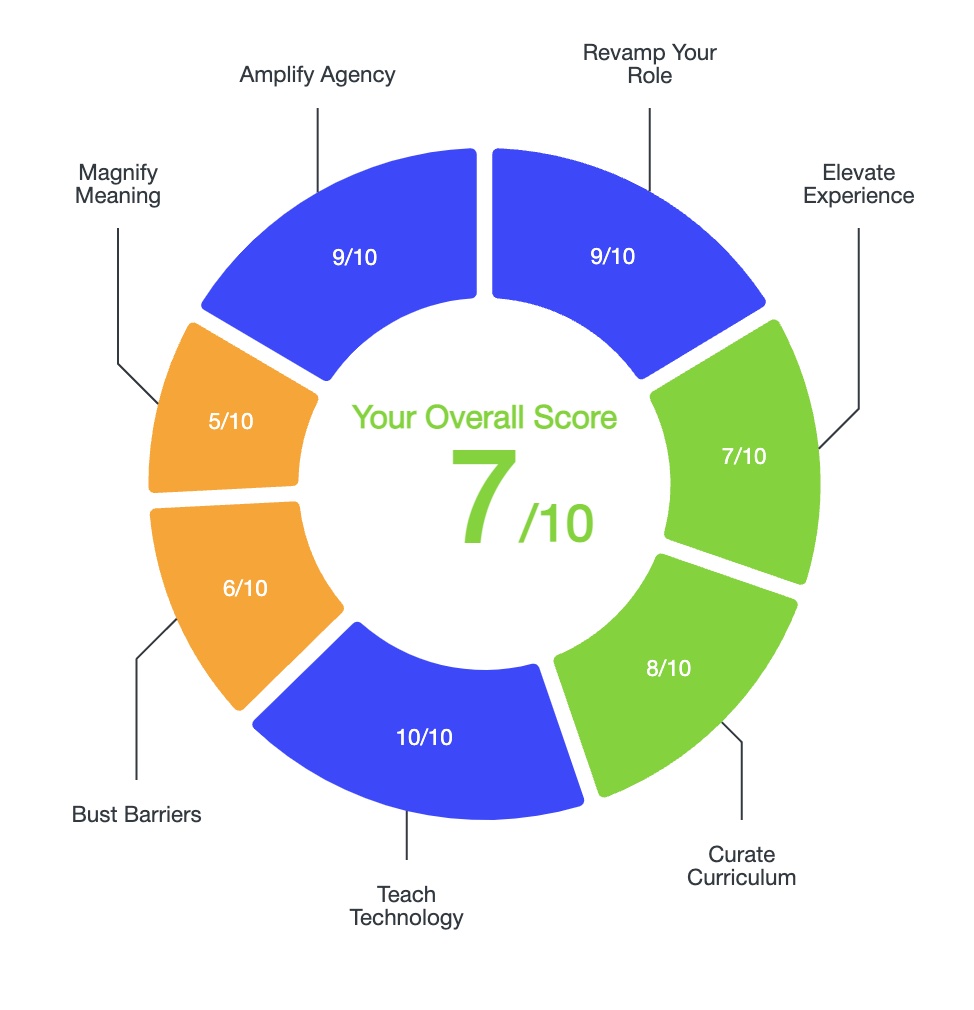
The key elements of the video planner are:
- Assign competencies & group roles
- Determine purpose of video
- Create characters
- Plan out scenes
- Write a script
- Plan for props & costumes
Unfortunately not all video editors have a Chroma Key function. In my opinion, the two best educational green screening apps are Do Ink and We Video. I use WeVideo with my students because we only have Chromebooks, and Do Ink is only available on IOS or Android devices. I also like that WeVideo has a simple, intuitive layering system for video editing that students find easy to learn and use. 
In addition to teaching students how to to use Chroma Key for green screening, it is also valuable to teach them how to trim and resize videos, how to layer in additional text or images, and how to add audio and transitions. See my tutorial to learn all about how to do all of these in WeVideo.