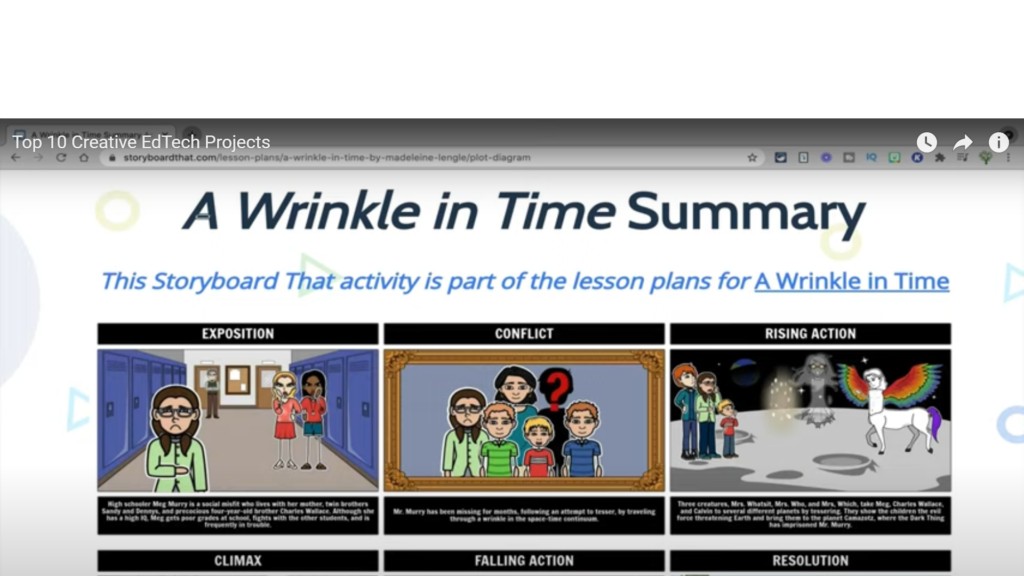
Project #1 is to have students make a digital comic, and my favorite program for making digital comics is Storyboard That.
You can use digital comics for students to summarize books using a plot diagram, to make timelines, for character analysis, to show what they learned about historical events, and more.
Note that Storyboard That offers a 14 day trial, but after that you would need to pay for a subscription.
Digital comics are also an effective tool for having students practice visualization skills, practice writing dialogue, as well as practice writing short summaries.
First I’d recommend having students fill out a template so you can give them feedback on the content of their work before they get into actually making their comics. This is important because it’s next to impossible for anyone to focus on content and design at the end time.

With Storyboard That the sky is the limit in terms of what students can do, and you can read this post for a more comprehensive description of how to use it in your classroom.
Videos are incredibly easy to make in Canva because making them doesn’t require any actual video editing skills.
Instead of using a layering system like more complex video editors, Canva just uses different slides that are animated to look like a video. When creating their videos, students can add different elements on each slide such as text and images.

Students can also easily change the animation style and color scheme as well as add background music to their videos, giving them a fully customizable look.
In addition to images, students can also import actual video files and then add text on top of those as well.
As an example, you might have students film part of a science experiment on their phones and then upload it to Canva to make a video about the experiment.

Educators can get a Canva for Education account for free by signing up here. Learn more about how to use Canva in your classroom in this other post.
The 3rd creativity project is an ebook or digital book using Book Creator.
Just like digital comics and videos, you can use digital books for students to show their understanding across all subjects and grade levels.

With Book Creator, you can access one library and 40 books for free and after that the program costs $10 a month for unlimited use. If you don’t want to pay, you can also archive your old library and open up a new one.
Book Creator has a library of digital books you can show to your students to help inspire them. When using exemplar e-books, you’ll want to point out that digital books are different from regular print books because you can embed multimedia in them, such as video and audio files.
When creating digital books, be sure to teach students about the importance of presentation as a creativity skill. The content of their book might be amazing, but if it’s poorly presented, it’s likely going to be poorly received.
That’s an important life lesson!

So teach them about font families and color schemes, and if you don’t personally know about graphic design, there are lots of free resources you can find online to help you out.
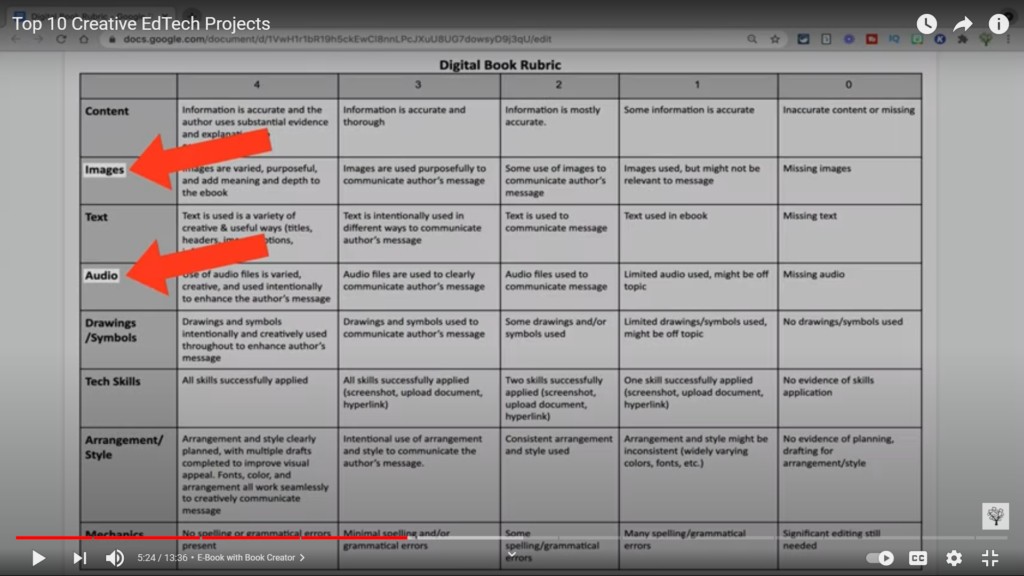
I’d recommend you also show them all the different multimedia tools and emphasize the importance of incorporating multimedia into their books since they are digital books, after all.

I’d even recommend incorporating all the different multimedia tools into your project assessment rubric (See below). For more details about using digital books in your classroom, click here.
#4 is a podcast project, and my favorite podcasting program is Soundtrap.
Soundtrap offers a free 30 day trial, which should be plenty of time for you to try out a podcast project, and after that it does require a paid subscription.
For an extended 90 day Soundtrap trial, click here and use the promo code: NewEdTechClassroom2021
The key to a successful podcast project is in the planning and preparation. Once students decide on a topic, you can have them do some additional research to increase their knowledge of the subject.

Then, have students decide whether or not it makes more sense to record a monologue or conduct an interview. For both choices, you’ll want to have students plan out their recording ahead of time. An excellent podcast planning resource is KQED’s “How to Write a Perspective” curriculum guide.

If students are going to conduct an interview, you’ll likely want to have them use the Soundtrap app, rather than the desktop version, so they can record the interviews on their phones.
Soundtrap also has a collaboration feature which allows students to enter the same studio and record their podcasts/mix their audio, even if they aren’t in the same physical space.
After students are done recording, Soundtrap has some useful features like the ability to transcribe the audio file and then edit the audio directly via the transcription. So if there’s a part of the recording students want to remove, they can just delete the words in the transcription, and that will delete the actual audio.
And since Soundtrap is also a music making platform, students can also add sound effects and musical loops to create a podcast interlude.
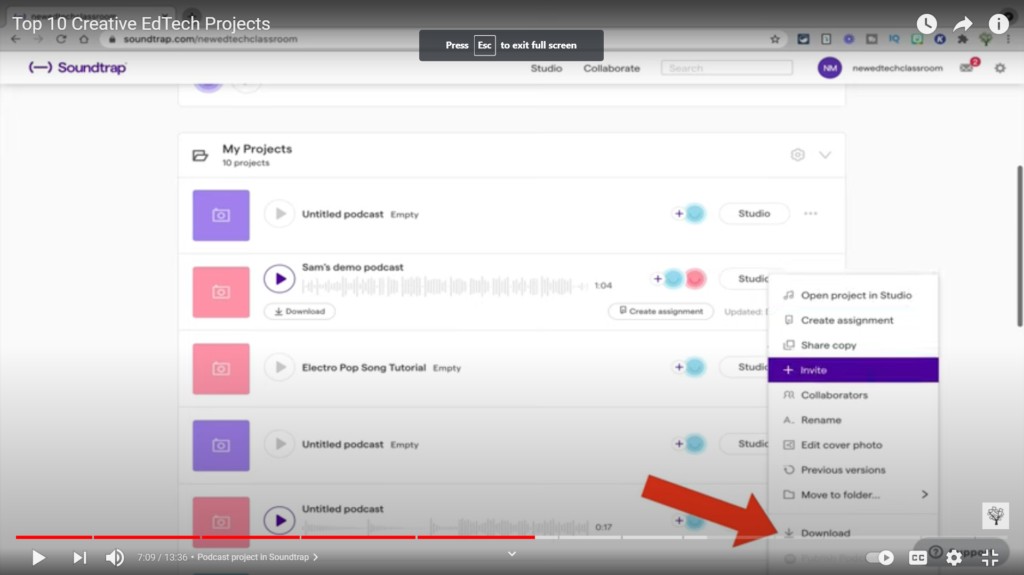
Once students finish editing their recordings, they can download the audio files and upload them to a class website, or even to an actual podcast publishing site like Spotify or iTunes. Just make sure you have permission from you school, students, and families before making their podcasts public.
Click here to learn more about doing a podcast project in your classroom!
The 5th idea is to have students create a paper-based project (or any non-computer related project) and then have them take a picture of it or a video of it using Seesaw.
Seesaw is a multimedia layering tool, so after students have captured their work, they can use the audio, video, image, or drawing tool to add another layer onto their project. For example, students could upload an image of a poster and then add a video on top of the image explaining what the poster is about.

Seesaw is also an ideal tool for creating digital portfolios at any grade level. Learn more here.

#6 is to have students make a webpage to show what they’ve learned using Adobe Spark Post.
Webpage projects are an ideal way to have students showcase a summary of what they’ve learned over the course of the entire year. You might also use webpage projects to have students make an argument, present research or a portfolio of their work, or create a newsletter/blog.

Although it might sound like a huge undertaking to have students design a webpage, Adobe Spark webpages are more like a stylistic presentation than an actual webpage, and they aren’t difficult to make.
To make a Spark webpage, students don’t need to know how to code, they can add elements to their webpages like images, text, and videos with a single click. Students can also easily change the theme and colors to create a more custom appearance for their pages.

Click here for a more detailed breakdown of how to create a webpage project in Adobe Spark Post.
The 7th project is an advanced video project.
When you’re ready to bring more advanced video editing software into your classroom, WeVideo is a great place to start.
WeVideo is web-based and doesn’t require you to download and install the software, so students can use it on Chromebooks.

One of my favorite video projects to do with WeVideo is a skit. Since students can collaborate together on making a video in WeVideo, they don’t even necessarily have to be together to make a skit: they would just need to upload their individual video files.

In addition to uploading their own files, they can also add video clips from the stock library in WeVideo, as well as customizable transitions, text, and audio.

Although WeVideo is a much more advanced video editor than Canva’s, its layering system is still intuitive and easy to get the hang of.

Another plus for WeVideo is that it has a chromakey feature, so you can also use it to make green screen videos, which will allow students to swap in different backgrounds, and make their skits more realistic.
Click here to learn more about making a collaborative green screen video project with students using WeVideo.
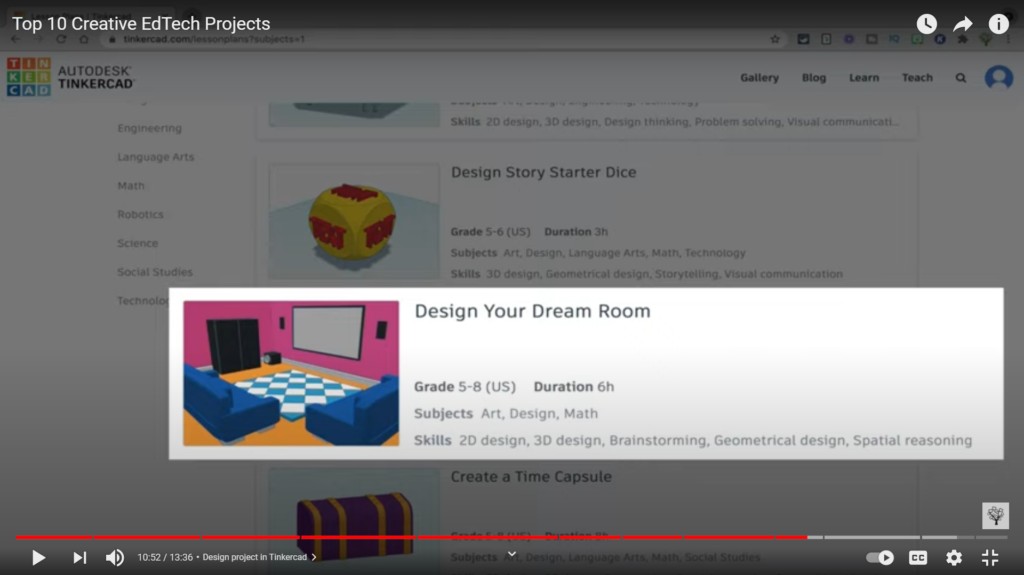
The 8th idea is to have students make a design project in Tinkercad.

In Tinkercad, students can create three-dimensional designs, so you can use it to have students design solutions to real-world problems. For example, they might design an invention to help clean up plastic pollution.

Another option would be to use it as an alternative to a more traditional model or diorama project.

In a makerspace class I co-taught this past year, students designed a model community center with objects to go inside the community center, and then we printed out the entire community center with a 3D printer and gifted it to the actual local community center. It was an incredible experience for our students!
#9 is to have students make a digital map in Padlet.
To make a map, students will need to sign up for free Padlet accounts and then choose the Map board. Click here if you need a student tutorial to show them how.

After they’ve chosen a Map Board they’ll see that there are some different map styles that you can choose from.

Once your students have picked a map style, they can create new posts based on specific locations on the map. Students can either drop pins on the map or they can search for a specific location that they’re looking for.
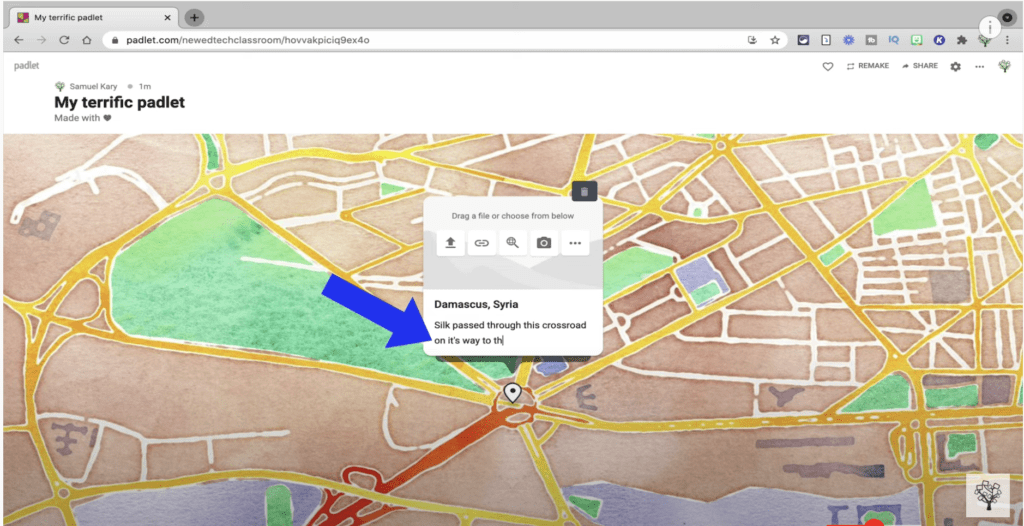
As an example, if you were doing a history project where students were tracking important locations along the Silk Road, students could search for those locations and then write a description about why each place is important.
In addition to text, students can also add images as a way to supplement what they’re trying to show in the post.
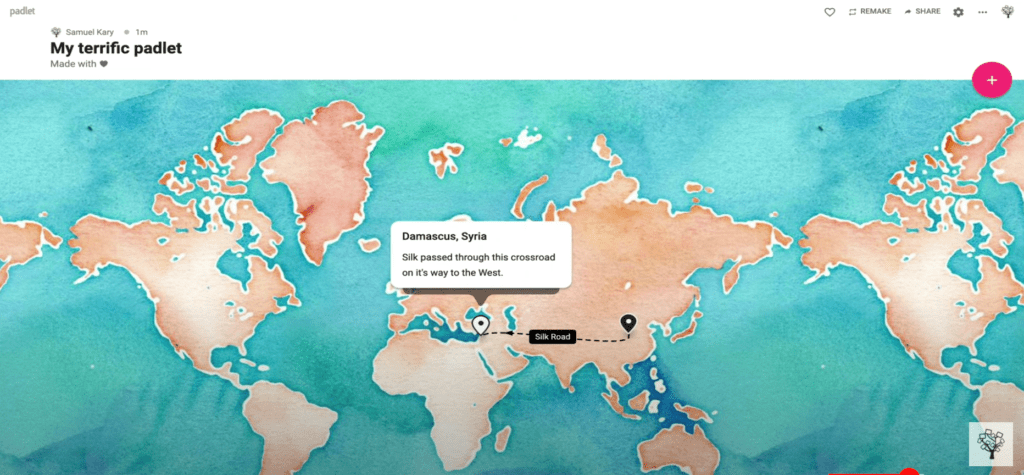
Once students have created more than one pin, they can connect the pins together to show the relationship between places. Here, you can envision how a student could create an entire map with all the important locations of the Silk Road and then string them all together to indicate the trajectory of the trade route.
Check this post for additional ideas for creative ways to use Padlet in your classroom.
The 10th and final idea is to have students design their own Augmented Reality or Virtual Reality experiences using CoSpaces Edu.
CoSpaces uses drag and drop coding similar to Scratch.

On their website you’ll find lots of ideas for how you could integrate AR & VR design into different subject area classes.

Students use Co-Spaces to design simulations and test experiments, so it would be a great choice for a creative digital project to do in your science class.